 0333 323 2100

When it comes to home renovation, one thing almost everyone will more than likely have to do at some point is wire up a light switch. Light switches are standard features in homes and buildings usually consisting of a piece of white square-shaped plastic. However, with a little bit of effort, you can replace that white plastic with something more exciting to add a personal touch to your rooms, like coloured or metal faceplates for example!
Although the thought of rewiring a light switch might seem daunting, in reality, it is a lot simpler than most people imagine. So, at Smiths we’ve put together this handy guide that you can use any time you need to switch things up!
To get this job done, you’re going to need a few tools to help you along.
You will need:
- Voltage tester
- Pen, paper, tape (to leave your note on the fuse box)
- VDE Screwdriver (a screwdriver that’s safe to use when working with electricity)
- Your smartphone (for a torch and to take pictures)
Always prioritise your safety
It’s no secret that electricity can be pretty dangerous, even at low voltages. So, when you’re working with electricity, it’s critical to take all the necessary precautions to avoid any accidents. Even a slight misstep can carry a lot of risk, and the higher the voltage, the more risk involved. So, the golden rule is: take your time and be safe rather than rush and regret it later. Before you undertake any task of an electrical nature it’s important to take the necessary precautions.
- As the first port of call, always make sure you turn off your mains electricity at the unit or fuse box to lower the risk of any nasty electric shocks. Then use a voltage tester to ensure it’s definitely turned off before you begin, for extra peace of mind and clarification.
- If you’re working in a building with multiple people, leave a note on the fuse box to let people know that you’re working the circuit, so no one accidentally turns it back on before you’ve completed your task.
- To check if a circuit is dead and safe to work on, use a voltage tester/meter designed explicitly for lighting circuits. These tools will confirm whether the circuit is safe to work on.
- After finishing any electrical work, make sure to check it with a voltage tester for lighting circuits before switching it on. This will help ensure that your work is installed correctly and safe to operate.
A good tip to ensure the light you’re working on doesn’t currently have volts running is to switch it on before you turn off the mains at the fuse box. If you come back and the light switch is now off, you’re more than likely good to go. However, to be 100% certain, we’d always recommend using a voltage tester.
Changing a light switch can be simple if you feel confident enough with basic electrics to do the job safely and correctly, but if you have any doubts or feel any sort of apprehension, that’s okay! Just get in touch with a trade professional or someone with more experience and have them take care of it for you.
Some useful things to know:
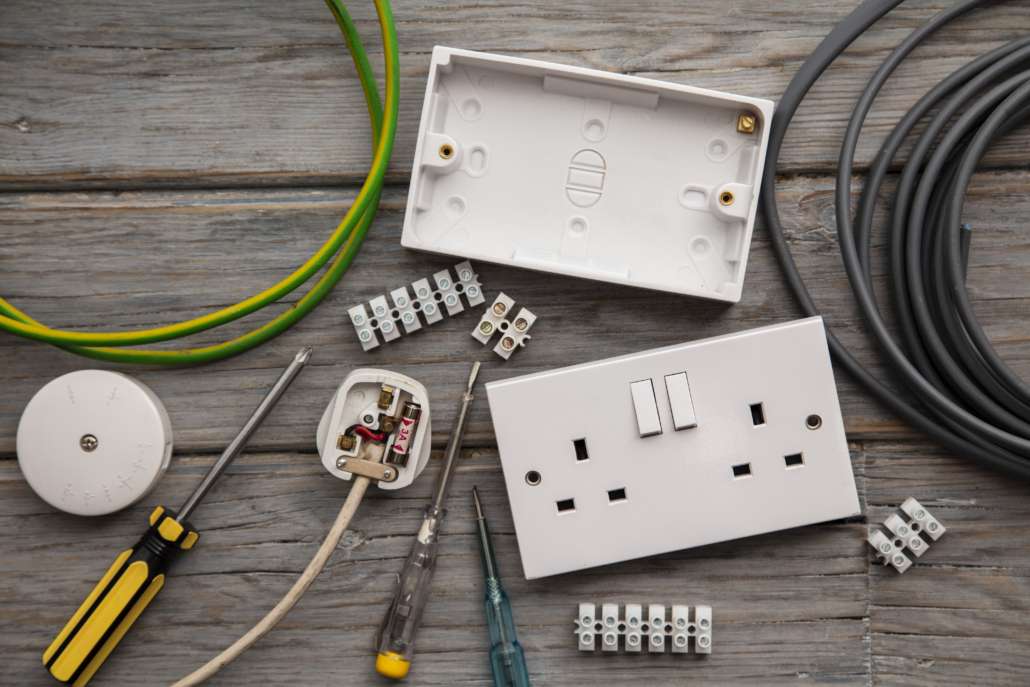
- Back box – A box mounted within the wall to house the wires. The edges of this box will be flush with the plaster of the wall and concealed.
- Pattress box – A box fitted to the surface of the wall. The way it’s constructed means all sides of the pattress box are exposed.
Step 1 – Remove the faceplate
Using a VDE screwdriver, unscrew each side of the faceplate and remove the screws from the wall – put them somewhere safe where you aren’t going to lose them. Now the screws are out of the wall, you can gently pry the faceplate off the wall. It’s Important not to pull too hard, as you don’t want to damage the wires! Now, with your voltage tester, check to ensure there’s no current running to the switch. If there isn’t, you’re ready to crack on.
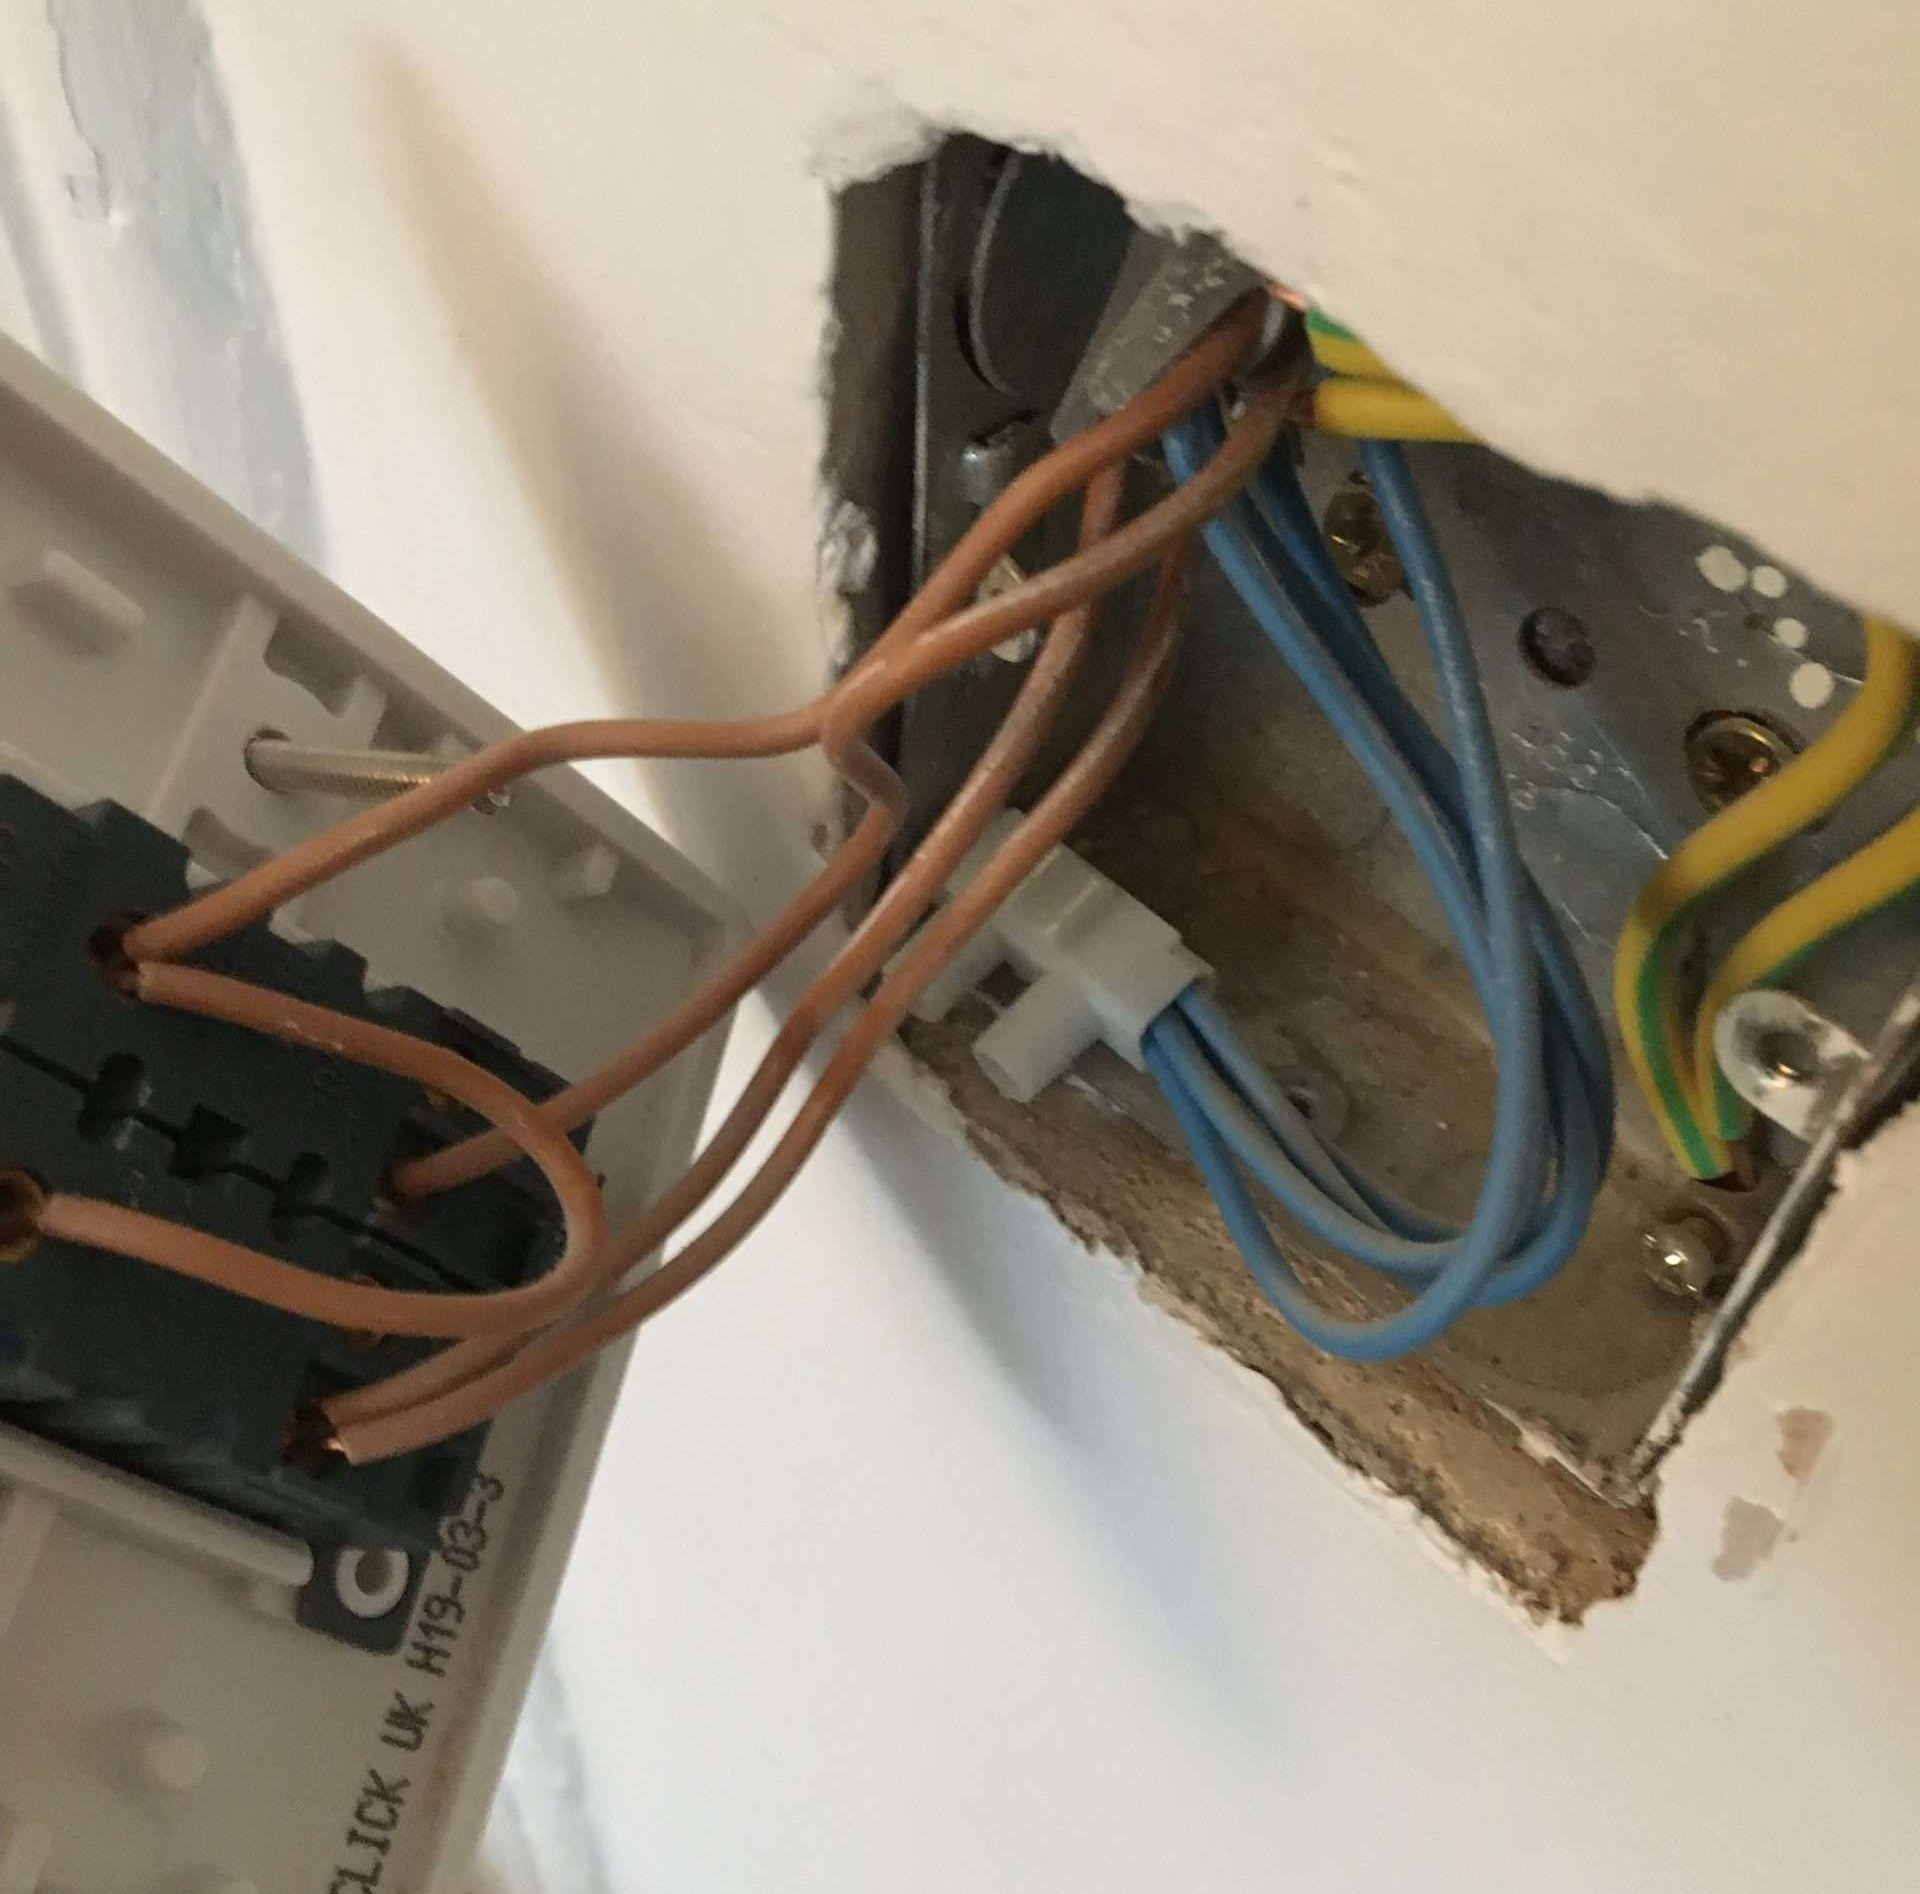
Step 2 – Memorise the way the wires connect to the faceplate
It’s always a good idea to make a note of the way the switch is currently wired up, as it will help you to determine where each wire connects to the faceplate. You might need a torch for this step if it’s particularly dark or hard to see the colours of the wires behind the switch. You want to ensure you have a clear view of what goes where.
If you have a light switch that is installed in a metal box, also known as a back box (which is quite common), there should always be a covered green and yellow earth wire running from the earth terminal on the switch to the earth connector on the back box. This ensures that electrical current is safely directed to the ground.
When you can see adequately, write down which coloured wire connects to which terminal. It’s wise to take a few pictures of how it looks before you take it apart for good measure.
This is how it should look:
- Brown or Red to the Common terminal
- Blue or Black to the L1 terminal
- Green and yellow to the Earth terminal (⏚)
 If both your back box and faceplate are made of plastic, and there is no earth terminal available for you to connect the wire to, it’s best to cover the bare wire with green/yellow sleeving and clamp the exposed edges. This will ensure that you can safely change the switch again next time.
Note: If you notice that there’s no earth wire, stop immediately and seek the advice of a professional. This is a sign that the switch is either incredibly old or has been previously wired incorrectly making it potentially dangerous.
Step 3 – Remove the wires and connect them to the new switch
If everything is as it should be, you can start to remove the wires one by one by unscrewing the terminal screws on the back of the faceplate using your VDE screwdriver and pull the wires free. If the earth cable is connected to the back box, you only need to disconnect it from the faceplate, not the box itself. Then, pull up the photos and notes you took of how the switch was wired up before you removed the old faceplate.
Check your new switch for a top and bottom and ensure it’s the right way up. Then, check where the terminals are in comparison to your new switch, as they could be in different places. You want to connect the wires to the right letters and symbols, even if the position might be slightly different from the previous switch.
Now you want to connect:
- The Brown or Red wire to the Common terminal
- The Blue or Black wire to the L1 terminal
- The Green and yellow wire to the Earth terminal (⏚)
Note: Push any excess earth cable from the back box to the earth terminal and tighten it. And if you’re using a metal switch, make sure you earth the switch faceplate.
After that, test if the wires are secure by giving them a gentle but firm tug to ensure that they won’t come loose behind the switch, push the wires back into the backbox (if there is one) and replace the faceplate by adding back the screws.
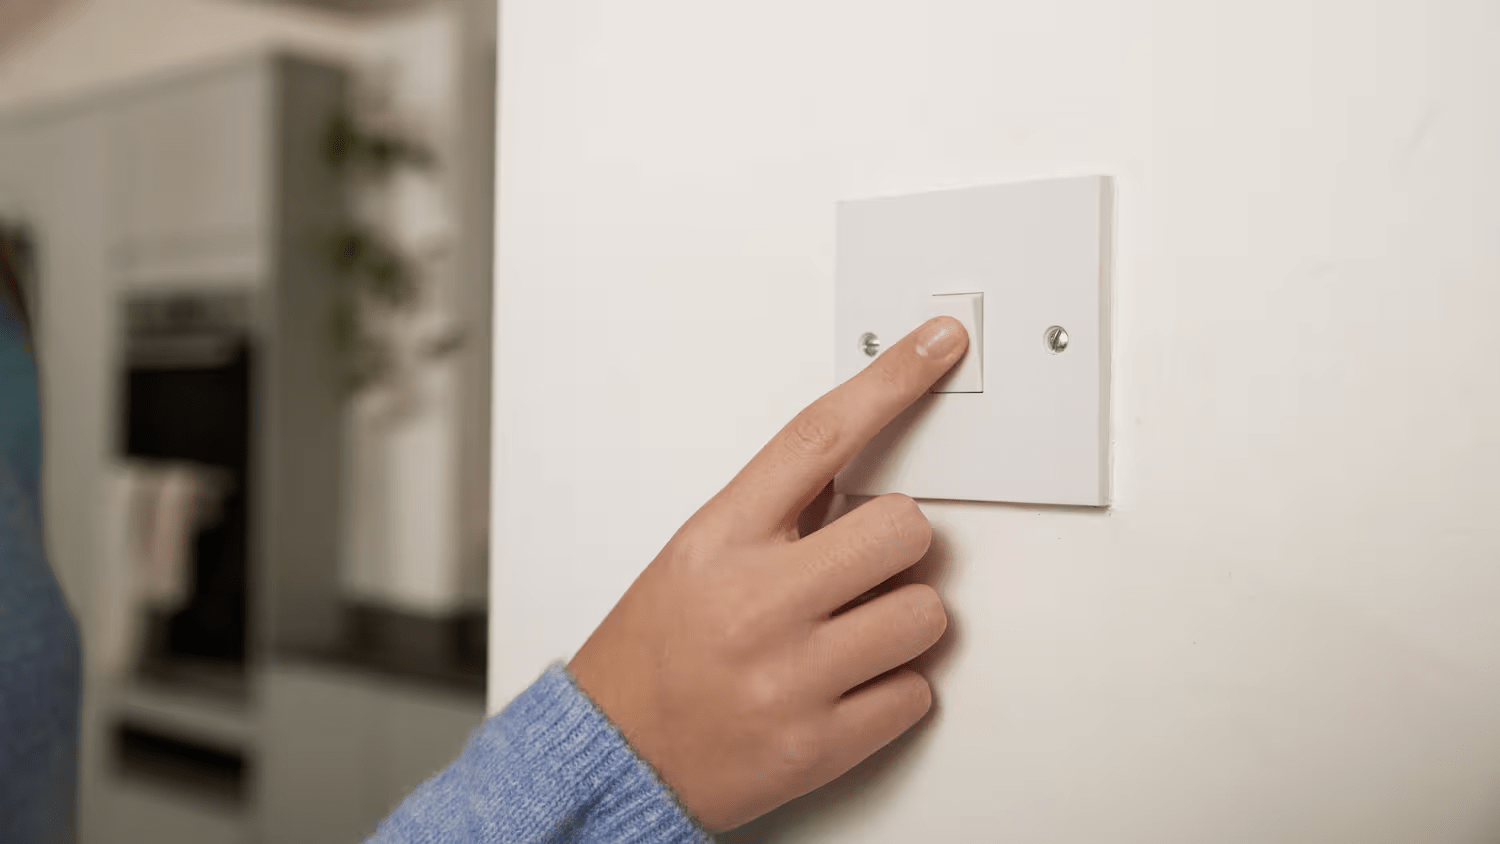
Step 4 – Turn the power back on and try out your lights
Now go back and switch on the mains electricity at the unit or fuse box, so the current is once again running to the switch. When you come back to the room you’ve been working in, depending on what position the switch was left in, the light could either be on or off. Click the switch to check it has been wired up correctly, and if it acts as usual, then you did everything correctly.
If you’re convinced you did everything correctly and your switch still isn’t working, it could be that the cabling is damaged, the switch is faulty, or it’s the wrong kind of switch. At this point, it’s best to contact an electrician and have them come to take a look at it. They’ll help you get it sorted in no time!
Go the extra mile with DIY
Apart from changing your light switches, you might also be revamping the rest of your space or room, and if you’re looking for the right tools to get the job done, you’re in the right place! Here at Smiths Hire, we have everything you need from drills to nail guns, to cleaning equipment and beyond. As well as a vast selection of decorating equipment, including paint sprayers, wall strippers and paddle mixers. So whatever you need, look no further than our tool hire services!
At Smiths Hire, we’ve been providing quality equipment and tool hire services to the DIY and trade sectors for more than 50 years, operating from 16 tool hire depots across the North West and Yorkshire, including several in major hubs like Manchester, Liverpool and Leeds. If you’re not sure what you need, give our team a call on 0333 323 2100, we’re always happy to help!